Share your homesteading projects
Make new homesteading friends
Ask homesteading questions
Blog your homesteading journey

Debbie Pribele
441 posts
and
19 followers
in over 2 years
in over 2 years
More from Debbie Pribele
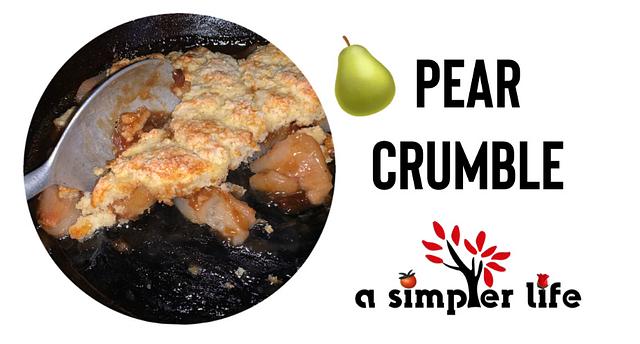
Fruit Crumble Dessert

Today, I made Pear Crumble from pears I preserved from my garden.
Preparing the Pears
Let’s get started:
- Preheat the oven to 375 F
- Butter (heavily) a baking pan. I chose to use my large 8” cast iron pan, to bake the pear crumble
- I opened and drained 2 pints of canned pears from my preserves, reserving the juice. (NOTE: the pears are from a tree in my backyard and were preserved in a light syrup)
Sweet Batter
Next I made a sweet batter to spread over the pears.
In a small pot combine:
- 3/4 c packed brown sugar
- 3 tbsp flour
- 1/4 tsp cinnamon
- 1/8 tsp salt
- 2 tbsp lemon juice
- Note: I added a tiny splash of liquid from the pears, in place of the lemon juice. And, I think I use closer to 1/4 cup, making a moister consistency for spreading
Heat to melt the sugar, stirring, and, then, spread the sweet batter over the pears (or just add dollops on top of the pears, which is what I did.)
The crumble
Mix to a crumble:
- 1 c flour
- 2 tbsp sugar
- 1 tsp baking powder
- 1/2 tsp baking soda
- 1/2 c buttermilk (or milk with a tsp of vinegar added)
- 3 tbsp butter
Spread over the top of the pears and batter
- - -
- - -
Note: instead of buttermilk, I added 1/2 c of freeze-dried milk and then added 1/2 of the reserved juice as the liquid. This created more of a cake consistency, which Rick liked better than the crumble.
- - -
Sprinkle a bit more sugar over the top, if desired.
Bake for 30-35 minutes
Adapting:
- Can you use honey instead of sugar? I don’t know. Let me know if you try it.
- Apples or other fruit instead of pears? Can’t see why not.
Results
The dessert was delicious and passed the test of Rick’s sweet tooth.
It feels so good to eat something that you grew and preserved yourself.
✔️ Home grown
✔️ Home preserved
✔️ Home cooked
- Debbie
Shopping
These products are what I use and all opinions expressed here are my own. This list may contain affiliate links from which, at no additional cost to you, I may earn a small commission if you choose to use my link … and if you do, know that I appreciate you!
- Measuring spoons
- Cast iron pan (similar to mine)
- Kuraidori induction Cooktop (I love my Kuraidori and rarely use my stovetop.)
a simpler life

